
Attic insulation reduces summer cooling costs by 15-30% in Indiana homes by blocking heat transfer from the roof deck into living spaces. This comprehensive guide shows homeowners how attic insulation keeps homes cool in hot weather, with five actionable steps achievable in one weekend to two weeks depending on project scope.
Skill Level: Beginner to intermediate for assessment; professional installation recommended for optimal results.
Timeframe: 1-2 days for assessment; 2-5 days for professional installation.
Expected Outcome: Lower attic temperature by 20-40°F and reduce air conditioning efficiency demands by up to 25%.
Before You Begin: Prerequisites for Attic Insulation Summer Cooling
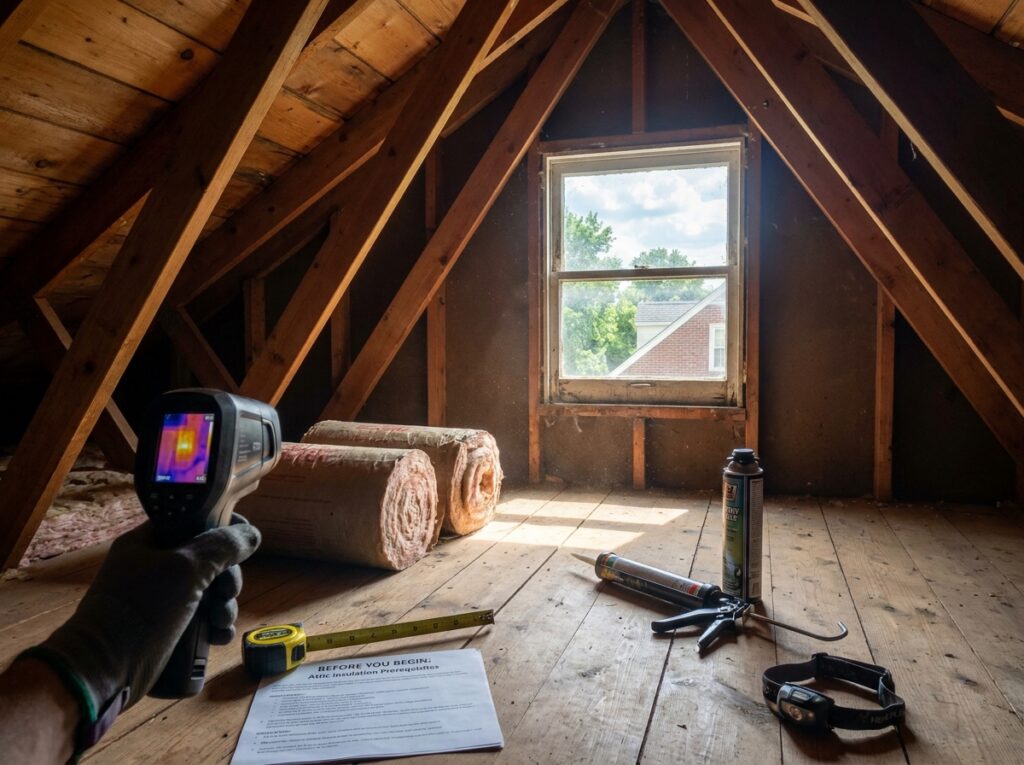
According to the Department of Energy (2024), Indiana falls within climate zone 5, requiring attic insulation R-values between R-49 and R-60 for maximum energy efficiency. Before starting this project, gather the following information:
- Current insulation depth and type in your attic space
- Existing attic ventilation (soffit vents, ridge vents, gable vents)
- Recent utility bills to establish baseline cooling costs
- Evidence of moisture control issues or air leaks
- Access to a qualified insulation contractor for complex installations
Safety Note: Always wear protective equipment when entering attic spaces, including gloves, dust masks, and long sleeves to prevent insulation fiber exposure.
Step 1: Understanding How Attic Insulation Blocks Summer Heat
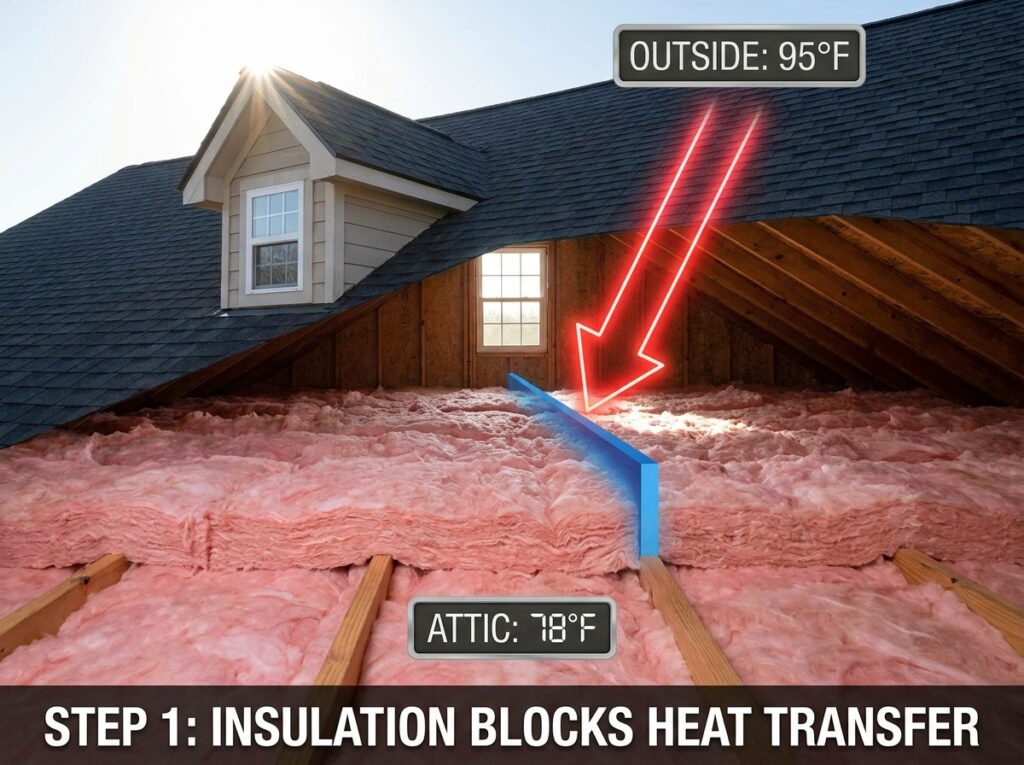
Attic insulation prevents heat gain through three mechanisms: blocking conduction, convection, and radiation. The roof deck absorbs heat radiation from direct sunlight, raising attic air temperature to 130-160°F on summer days. Without proper thermal resistance, this heat transfers through the ceiling into living areas, increasing cooling system workload.
The R-value measures thermal resistance properties—higher numbers indicate better heat prevention. According to Energy Star guidelines (2024), Indiana homes require R-49 to R-60 attic insulation for optimal summer temperature control. This insulation thickness creates a heat barrier that maintains a temperature differential between the hot attic and cooler living spaces below.
Key Principle: Each additional R-10 of insulation reduces heat flow control by approximately 40%, directly improving air conditioning efficiency and indoor comfort.
Step 2: Assess Current Attic Insulation and Identify Heat Gain Issues
Measure existing insulation performance to determine upgrade needs:
- Measure insulation depth in multiple attic locations. Fiberglass batts should be 16-22 inches deep; blown-in insulation requires 19-22 inches to achieve R-60.
- Check for gaps and thermal bridging around ceiling joists, recessed lighting, and attic access points where air infiltration prevention fails.
- Inspect for moisture damage including condensation stains, mold, or compressed insulation indicating vapor barrier failures.
- Record attic temperature on a sunny afternoon. If attic air temperature exceeds 130°F with adequate ventilation, insulation coverage is insufficient.
- Identify air leaks around plumbing vents, electrical wires, and ductwork penetrations in the thermal envelope.
Use these measurements to calculate current R-value. Fiberglass insulation provides approximately R-2.9 per inch; cellulose material offers R-3.7 per inch. Compare results against International Energy Conservation Code requirements for your building codes jurisdiction.
Step 3: Select the Best Insulation Type for Summer Cooling
Each insulation material offers distinct thermal insulation benefits for attic heat reduction:
Fiberglass Insulation
Fiberglass batts or blown-in fiberglass provide reliable thermal protection at $0.64-$1.19 per square foot installed. This material resists insulation settling and maintains consistent insulation density over decades. Fiberglass attic insulation summer cooling performance remains stable in temperatures up to 180°F.
Cellulose Insulation
Blown-in cellulose insulation offers superior insulation effectiveness at R-3.7 per inch, achieving R-60 with less insulation depth. Cellulose attic insulation hot weather performance includes natural fire resistance and better air sealing cooling benefits around irregular framing. Cost ranges from $0.60-$1.20 per square foot.
Spray Foam Insulation
Spray foam insulation creates an air-tight thermal boundary with R-6.5 per inch (closed-cell) or R-3.7 per inch (open-cell). According to research on spray foam attic insulation summer benefits, this material eliminates thermal bridging elimination completely and reduces cooling load by up to 30%. Installation costs $1.50-$3.50 per square foot but delivers maximum heat blocking.
Radiant Barrier
Reflective insulation or radiant barriers reflect up to 97% of radiant heat before it reaches traditional insulation layers. Install radiant barrier attic insulation summer systems facing the air gap below the roof deck for maximum radiant heat reflection. This addition reduces attic temperature reduction by an additional 10-20°F when combined with adequate loose-fill insulation.
Recommendation: For Indiana’s Midwest climate, combine R-60 blown-in cellulose with radiant barriers for optimal cooling energy savings and heat resistance.
Step 4: Install or Upgrade Attic Insulation for Maximum Cooling Efficiency
Professional insulation installation ensures proper coverage and ventilation balance:
- Complete attic sealing first. Seal all air leaks with expanding foam or caulk before adding insulation material comparison layers. This prevents air conditioning energy loss through gaps.
- Install vapor barrier on the warm (living space) side of insulation to control moisture management and prevent condensation during summer cooling.
- Add insulation to target depth. Professional installers use calibrated blowing equipment to achieve uniform insulation coverage at specified density, preventing future insulation settling problems.
- Maintain ventilation clearances. Install baffles at soffit vents to preserve airflow while achieving full insulation thickness at eaves.
- Mark insulation depth. Place permanent markers showing insulation installation date and achieved R-value for future reference.
Quality attic insulation summer cooling installation by certified contractors ensures compliance with building envelope standards and maximizes energy conservation benefits.
Step 5: Ensure Proper Attic Ventilation Balance
Proper ventilation requirements work synergistically with insulation for optimal attic cooling strategies:
- Calculate ventilation needs: Provide 1 square foot of net free ventilation area per 150 square feet of attic floor space (International Energy Conservation Code 2024).
- Balance intake and exhaust: Install equal amounts of soffit vents (intake) and ridge vents or gable vents (exhaust) for natural convection cooling.
- Consider attic fan installation: Powered attic fans reduce attic heat buildup by 15-25°F on peak summer days, though proper passive ventilation often suffices.
- Avoid blocking vents: Ensure new insulation doesn’t obstruct soffit vents, compromising ventilation balance summer performance.
Proper attic ventilation with insulation summer systems prevents moisture control issues and extends HVAC system lifespan by reducing cooling system strain.
Troubleshooting Common Attic Insulation Cooling Problems
If indoor temperatures remain high despite adequate insulation: Check for air conditioning efficiency issues including undersized HVAC performance, leaky ductwork in the attic, or insufficient attic insulation cooling problems from compressed insulation near eaves.
If utility bills don’t decrease: Conduct a professional energy audit to identify energy loss prevention opportunities in walls, windows, and the building envelope beyond attic insulation impact on cooling bills.
If attic insulation becomes damp: Improve moisture management by installing or repairing vapor barriers and increasing attic ventilation to prevent condensation that reduces insulation performance.
If attic temperature stays above 130°F: Add reflective attic insulation summer heat reduction materials or verify that ventilation requirements are met with unobstructed airflow.
Next Steps: Maintenance and Professional Energy Audit
After completing attic insulation upgrade for hot summers, schedule these follow-up actions:
- Monitor cooling cost savings over the first full summer season, comparing BTU consumption on similar-temperature days year-over-year.
- Inspect insulation annually for settling, moisture damage, or gaps that compromise thermal mass and temperature regulation.
- Schedule professional energy audit within 12 months to verify attic insulation prevents heat penetration summer goals and identify additional weatherization opportunities.
- Document improvements for home improvement records and potential Energy Star rebate programs.
Proper attic insulation reduces HVAC workload summer demands, extends equipment lifespan, and delivers comfort improvement for decades. Indiana homeowners typically achieve payback on insulation installation cost summer savings within 3-7 years through reduced cooling costs and utility bill savings, while enjoying enhanced indoor climate control and temperature stability throughout summer heat seasons.